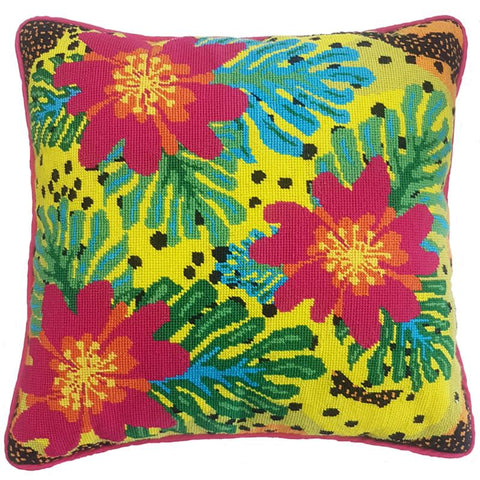
You can use different stitches to make your canvas stand out, but another simple method is to use different thread types.
For example, use thicker thread in the area you want to feature and thinner thread for the background. Cotton floss, perle cotton, wool, silk and blended threads; they all have different weights. You can use these differences to emphasize a particular area.
THREAD TYPES
These are the threads we use most often when we kit your canvas, and if you’re picking our “mixed threads”option, this is how we would use them:
1. Cotton floss and Stranded Silk threads
Both of these are stranded – typically 6 strands each piece. This allows you to use as few as 1 strand or as many as you’d like – even more than 6 if the area requires it. We use DMC cotton floss and Planet Earth 6 ply silk.
2. Perle cotton
Perle cotton comes in 2 weights- #5 and #3 – the latter being thicker. The thread is like a thin rope, so it has a coarser feel than the floss. The coarser thread can only be used on 13 mesh or larger canvas. We generally use #5 DMC Perle cotton for either size mesh, but you can request the heavier Perle cotton if you prefer it.
3. Silk
Single-stranded silk from Planet Earth comes in two weights- Planet Earth Silk (heavy) and Pepper Pot silks (lighter). Both have a sheen, giving the area a glossy look. Planet Earth silk is only for 13, 12, 10 or 7 mesh canvas. Pepper Pot silk can be used on any size mesh.
4. Wool
We use Vineyard Merino wool and Planet Earth Wool threads interchangeably. Both can be used on 13 mesh canvas. Vineyard Merino tends to be a bit thinner, but we generally choose depending on the color match. Both brands are heavier than the silk or cotton and do not carry a sheen. Wool is recommended for
pillows as it is more durable than any other option. If you’re doing an ornament or other 18 mesh canvas with detail and choose wool, we will use Bella Lusso wool which is very fine.
5. Blended wool & silk
Although there are many blended threads, we carry Essentials which is single ply and appropriate for 13 or 18 mesh.
6. Specialty Threads
These include Glisten and Kreinik and are of varying weights. All have a sparkle and can add dimension, but mostly are used to add bling to the canvas.
HOW WE CREATED A FOCAL POINT ON THIS CANDY CANE USING THREADS
First, determine the area you want to emphasize. In this Rudolph Candy Cane by Danji Designs I’ve used Stranded silk, Pepperpot silk, Essentials, Kreinik braid, Perle cotton and floss to add dimension to the canvas.
The Reindeer should be the focus of this canvas (in larger pieces you may have more than one focus). So, I used heavier threads on Rudolph’s body and scarf. The body is done in Essentials blended thread. Although the stomach looks heavier, this is due to the stitch used. (But that’s another story!)
The antlers are stitched in Perle cotton and the nose in Neon Rays by Rainbow Gallery.
I used a mixture of stranded silk and Pepperpot silk for the scarf, starting with the pattern in green using Pepperpot silk. My intention was to stitch the entire scarf in the same thread. However, I picked a modified Soufflé stitch for the red portion and when stitching it using Pepperpot, the thickness of the silk overwhelmed the pattern. So, I adjusted and picked a 6-ply silk, plied down to 3 strands. And voila!
Of course, I had to experiment with the number of strands so that my stitches did not overwhelm the green, but still covered the canvas.
The sky is also done by plying stranded silk thread. Here I used 2 strands rather than the 3 or 4 we generally recommend for 18 mesh canvas. This pushes the sky into the background and makes the reindeer the focal point of the design. (You can also try this technique using cotton floss, and we’ll often pick cotton over silk because there are many more colors available in the floss.)
Finally, I added a bit of bling in the stars, on the swirls, and on the bottom – after all, it is a Christmas ornament!
Design : Starry Night – Rudolph by Danji Designs
Thread guide and suggestions – Patricia Dee – www.needlepoint-for-fun.com. All rights reserved.
Shop Rudolph and other candy cane needlepoint designs by Danji.
]]>
Your canvas has large bold stripes: pinks, blues, greens, navy & white, it doesn’t matter. You love the canvas, but can’t figure out how to stitch the stripes without overpowering the main theme. Read on and we’ll give you some ideas about how to stitch those bold stripes so that they complement your needlepoint.
Many canvases have a simple theme on a bold stripe. The Flamingo & Palm Tree canvases by the Collection of Designs and the Starfish by Associated Talents are good examples of those.
Others, change it up a bit with softer stripes with more colors. Either way, you must first choose whether you want to play down the stripes or highlight them.
PLAY THEM DOWN: The best way to stitch the BOLD colorful stripes is to play them down. They should be the back drop to the main theme – the star fish, palm tree, flowers or flamingo.
Stitch the main theme first. Use a glittery thread, or one with full coverage.
Now do the stripes in a thinner, flat (non-glittery) thread. If you’re using a stranded thread, use 2 less strands for 13 mesh 1 less for 18 mesh than your main theme. If using a single ply thread use two weights, the thinner one for the stripes. We use Planet Earth fibers for example. They offer 2 weights in wool and silk – use the heavier weight for the star fish, crab, flower and flamingo, the lighter for the stripes.
EMBRACE THE STRIPES: You love those bold stripes – embrace them and stitch them with heavy or sparkly thread – or try one of the stitches below and show them off.
The STITCHES: Here’s some suggested stitches which can be used regardless of whether you want to play down the stripes or highlight them. Use your thread to determine the emphasis.
I’ve started with the easiest stitch – moving to the most difficult. Regardless of the stitch used, you will have to compensate around the main object.
Alternating Tent Stitch
Alternating tent stitch– You can use this stitch on the stripes in all the canvases. It is a light, airy stitch that looks elegant when complete. Stitch it in the direction of the stripes – Vertical (first graph) for the Casbah & the Starfish canvases, Horizontal (second graph) for the Flamingo or Crab canvases. Ply down your thread or use a lighter weight thread to play down the area. Use a heavier, brighter thread to make it bold.
The red stripes in the Little Panda needlepoint kit by Animal Fayre above are done in a Vertical Alternating Tent stitch.
Mosaic & Scotch Squares
Mosaic Squares or Scotch squares: This is a bolder look. Count the rows in each color. If divisible by 2 use the Mosaic Squares (left); if by 3 use the Scotch Squares (right). Do one of the colors in the squared stitches and the other in a tent stitch, or do them both the same.
ONLY use these stitches if the stripes are uniform.
Woven Needlepoint Stitch
Woven: This pattern works for all of the canvases above. Compensate at the top and bottom rows with a tent stitch.
Finally, if your stripes aren’t uniform (like the crab above) use either the Alternating tent or Woven stitches. Or, stitch the large stripes in a tent stitch and do the single rows in an x stitch.
Remember – Ply down when playing down the area, use Glisten to make it Bold.
]]>
Stitching a slope, whether a hill or a mountain, is a matter of gradient. The stitch you choose can make an area look gently-sloped or downright steep.
Eyeball the mountain you want to stitch - line your finger up along the contour. Is it a small hill or a steep mountain?
Misty Mountain (above), by JulieMar & Friends, is a landscape design (5" x 5") that shows several stitches to use on slopes.
Which stitch is the best for the mountain slope on your design?
Here are four needlepoint stitches you can use on different slopes. Pick the one that best suits your canvas...
The purple sloping hills in the background of this Lavender Fields needlepoint design by Maggie Co. are perfect for a Bargello stitch. Use one that goes up and down gradually, like this Bargello pattern.
The Diagonal Cashmere needlepoint stitch is a great choice for a steeper hill.
This stitch was used in the Misty Mountain canvas above (on the middle mountain).
The Diagonal Scotch stitch has a slightly flatter slope than the Diagonal Cashmere. However, it complements the Cashmere stitch, so these two stitches make a great pair when you have two sets of mountains or hills, one in front of the other, like this Amalfi Coast design by Laurie Ludwin.
Use the Diagonal Scotch needlepoint stitch for the lighter green hills in the foreground (and the Diagonal Cashmere stitch for the darker green hills behind).
Finally, you have a true mountain. It's steep and rocky, like those in Louise Marion's Mountain Lake design.
The Diagonal Roumanian needlepoint stitch is a great choice for steep mountains. You can go in either direction with this stitch, just follow the mountain slope. And, you can change the colors as you progress from the blue/purple mountains to the snow. (But keep each stitch component in one color: both the long diagonal line and the short crossing stitch).
This stitch was also used in Misty Mountain above (the top mountain range). The diagram below shows this stitch to the left, but you can also angle it the other way.
Decide which needlepoint stitch is the best one for the hill or mountain on your canvas.
]]>The Needlepoint Double stitch is simple and versatile. Learn how to do it, where to use it, and some tips on where to start the stitch on your canvas.
Where to Use the Needlepoint Double Stitch
The needlepoint Double stitch is non-directional which means it is best used for objects that don't move (much).
Use the double stitch to needlepoint bushes, trees, clothing, or any geometric shape. It fits in quite small spaces.
The double stitch in needlepoint is simply a combination of long x stitches over 3 and a traditional x stitch over one.
Stitch the long diagonal cross stitches skipping one row in between (3 up and 1 over). Work across the canvas, then return in the opposite direction.
The second row does not line up with the first - it falls between the stitches. Start two down and one over and continue across the canvas as you did with the first row. The next (third) row falls below the first - just make sure you skip a row in between.
Continue until your entire area is filled.
Next, a traditional x stitch is placed in the empty spaces. This time complete the x before going to the next space.
The traditional x can be done in the same thread, a different textured thread, or a different color.
Finally, fill in the gaps at the top and bottom. You will have to compensate here. Place a shorter x over 2 (pink) or a traditional x over one (yellow) in those spaces. Use the same thread that you used on the long stitches (green).
If your first row is straight – especially if it’s long – start the pattern in the second position (pink). This way you won't have two rows of single x stitches as seen at the bottom of the diagram above in yellow.
Remember, the Double stitch is versatile because it doesn't have a directional flow, and it fits in small(ish) spaces. So use it on geometric designs, landscapes, clothing, backgrounds. Make it a Double!
]]>
Uneven stitches on your needlepoint canvas can be distracting. Like the pimple that appears the morning of your wedding, an off-tension stitch can become the only thing you see.
But smooth and even stitches, like the ones on this Fruit Salad needlepoint pillow kit, are within easy reach.
Read on for...
(Sorry, we couldn't help ourselves)
Use a needle that is an appropriate size for both the thread and canvas mesh you are stitching. If the eye of the needle is too small, the thread fibers will bunch up inside it and may not sit flat on the canvas. A slightly larger needle opens up the canvas hole when you draw it through and provides a good spot for the stitch to ‘sit’ evenly.
Here's a guide for needle sizes...
Size 16 needle - 8-mesh canvas Size 18 needle - 10-mesh canvas Size 20 needle - 12 - 14-mesh canvas Size 22 needle - 16 - 18-mesh canvas |
Repeated pulling through the canvas wears on fibers and can make them uneven. Cut your threads about 18 inches in length. Go shorter than this for specialty fibers like metallic, velvet and sheers.
Every so often, stop stitching and let your needle dangle and unwind. Needlepoint threads twist as you stitch and if you don't let them unwind they may knot or bunch on the canvas. It's not just you that needs to unwind in the evening!
You can stitch with your needlework held in your hand, and many people prefer this, but if you mount your canvas onto stretcher bars you will likely find it easier to get even stitch tension. Stretcher bars are inexpensive and available in a variety of sizes.
If your thread is stranded, strip the fiber and then rejoin the strands before you stitch with it. Also, using a laying tool like this ergonomically weighted steel laying tool will ensure the stitches lie down smoothly when using a stranded fiber.
If your needle is dirty or tarnished it will affect the smoothness of your thread and your needlepoint stitch tension. It's a good idea to keep a pack of needles on hand, so you have a new one in the size you need, when you need it.
However, basketweave doesn’t go everywhere, and sometimes you might want/need to use a stitch that brings the needle up in an occupied hole. Slow down and make sure you create a place for it.
Starting a new thread halfway across a row can create an irregular stitch on the front. Starting only at row ends may not be practical on long rows of stitches but where you can, choose to start new threads with a new row.
For example, if you use a sewing method to stitch a tent stitch, use this across the entire color area. Also, avoid changing from Continental to Basketweave (or vice versa) within a color area.
In other words, keep your stitching method consistent across a block of color.
The angle at which your needle enters the canvas and pulls on the thread affects how the stitches sit on the canvas. Piercing the canvas with your needle perpendicular to it will give you beautiful neat stitches. If you change this angle by changing how you stitch, it will probably show up as an irregularity on the front of the canvas. This occurs particularly with lighter thread colors.
And there you have Ten Tips For Terrific Needlepoint Stitch Tension. Try these out on a new needlepoint project today!
The stitch is primarily done on top of the canvas. You can make the spokes visible or hidden. In the image, below, the spider web needlepoint stitch is used to create these beautiful ribbon flowers, and the spokes are hidden beneath the ribbon.
You can use any type of thread: cotton, wool, silk, a blended thread, even silk ribbon.
Hidden spokes allow you to have a more rounded shape to your stitch.
They resemble the spokes of a wheel and are placed in a circle over the area you want to cover. Stitch an odd number of spokes. Five or seven is best, depending on the size of the area to be covered. Place them equidistant apart.
Once the spokes are done, you will begin to weave your thread over and under each spoke, completely on top of the canvas.
This video from Needlepoint Now is a wonderful demonstration of how to do the spider web stitch. Click the link to see the demo.
https://www.youtube.com/watch?v=iWcpJU3GBpM
When you've covered the spokes, secure the thread behind the canvas and you're done!
If you want your spokes visible, you’ll have to stitch your Spider web a bit differently.
Start with the spokes in a circle, equidistant apart. This time you can create an even or an odd number of spokes.
This time you wrap each spoke in turn. Bring the needle up near the center of the circle and slide it under the nearest spoke from right to left. Wrap the spoke with the thread once. Slide the needle under the same spoke as well as the next spoke to the left. This will create a wrap on the first spoke and have the needle in place as you repeat this process.
Continue wrapping each spoke, working around the web and filling it in.
When you reach the edge, bring the needle back down through the fabric and secure the thread under one of the spokes.
If you enjoyed this blog post about how to create a needlepoint spider web stitch, please share it on social media. Also, sign up for our newsletter so we can alert you when we publish more helpful posts like this one!
]]>Do you want to stitch canvases with animals and pets but you can’t figure out how to make those ears floppy, and the tail swish?
The hair on animals––people too––is a mix of different colors. How do we make the hair or fur look real when armed with a needle and thread?
There are several needlepoint stitches that can be used to make animal hair or fur look realistic. We recommend three stitch options for straight hair, and a fourth for your curly-haired poodle.
This is a technique for stitching fur in needlepoint, rather than a single stitch.
First, stitch around the eyes, nose and mouth in a tent stitch––all the areas where the fur isn't long and you want the facial features to be as detailed as possible.
Yorkie Puppy Purse by Julie Mar Designs
Then, move to the outer edge of the area being stitched and pick one of the three methods below:
Long and short straight stitches are just that – a random mix of long and short straight stitches. You can use any threads to do this stitch. The stitches don’t need to go in a straight line and they don't need to be completely parallel with each other.
Run a long stitch, and then next to it, a short stitch, and a medium stitch, and so on––you're making it up as you go along. The only "rule" is that the stitches should run in the direction of the ear/body so that the fur looks realistic.
Avoid stitching in a pattern – the length of the stitches should be completely random. Mix the colors in the area as well––using different shades is part of the controlled "randomness" like you see on these puppy ears.
Spaniel Puppy in Purse by Julie Mar
The Split stitch is similar to the random short and long stitches, except you come up through the first stitch instead of on top of it––you are splitting the stitch with your needle.
The split stitch gives a bulky look – so it is not for fine-haired animals. It works best with a thread that’s tightly wound so that your needle will “split” the strands as you enter. Planet Earth wool and silk for 13 mesh or Pepperpot silk for 18 mesh are perfect. For this stitch, you will need a chenille needle––one that's pointy at the tip, rather than the dull tapestry needle we usually use for needlepoint––as this will help you pierce (split) the stitch.
To do the Split stitch, place your first stitch normally. For your second stitch, bring your needle up through the top 1/3 of the first stitch from underneath the canvas to the top. Your third stitch will come up at the top 1/3 of the second stitch and so on until your area is covered.
For a reminder of the outline stitch – click here.
To stitch a curved outline stitch, begin with the first row as you normally would. Start the second row immediately adjacent to the first stitch in the first row. Place your first stitch normally. When you come up to begin your second stitch bring the needle up in the row behind the first stitch, encroaching the stitched area.
Make sure you’ve moved the threads away so you don’t catch them. The next stitch should again come up under the row already stitched. Continue in the area you want to curve. This method will pull back that row and look natural. Your next row will be stitched the same way until your area is filled and the curve is in place.
You can stitch the entire area using this method like the Yorkie Puppy purse above, or just add a few defining features as in the Scottie Puppy purse by JulieMar below.
Scottie Puppy Purse by JulieMar KL 1016
Poodle Puppy Purse by JulieMar KL-1005
Finally, we can’t forget our curly-haired poodle. There are two simple stitches for the poodle, both used in this Puppy Purse by Julie Mar.
The first is a series of French Knots. – like those on the top of the puppy’s head. Don’t crowd the knots though–– every couple spaces use a tent stitch; it looks less bunchy.
The stitch on those floppy ears is a faux bullion knot – easy and fun. Take a strand of Planet Earth silk or wool or Pepperpot silk (you cannot do this with strand-able thread, so not your DMC cotton).
Happy Fur Stitching!
]]>
Needlepoint canvas is made from cotton and woven into an open-weave mesh.
Blank needlepoint canvas with 18 holes to the inch is called an "18 mesh canvas" or it is often referred to as "18 count". A canvas with 12 holes per inch is called a "12 mesh", or "12 count", canvas. The higher the number, the smaller the holes!
Read on to find out more about the types of blank needlepoint canvas.
Mono needlepoint canvas is what is called a single mesh canvas. This simply means it is woven with a single thread. These single threads are woven over and under each other in a typical weaving pattern and held together at the junction by sizing (starch).
Here's what mono blank needlepoint canvas looks like up close...
Since the intersections are loosely woven together, they will move. You might want them to move if you plan on using a variety of decorative stitches on your canvas. This is why almost all handpainted canvases are on mono needlepoint canvas - stitchers who complete handpainted projects tend to use a lot of decorative stitches and so they want the flexibility that a mono canvas gives them––the canvas intersections will adjust to allow for thicker and thinner stitches and various angles.
If you are stitching a tent stitch, and especially if you are not using a frame, then the canvas will inevitably go from a rectangle to a parallelogram. Using mono canvas will prevent this, somewhat, but more importantly, it will be easier to block the design back into its original shape.
Mono blank needlepoint canvas is the best choice for stitching projects that are going to be used as furnishings, such as chair cushions. Mono canvas is heavier and stronger. Also, because it "gives" at the intersections it is less likely to break at these intersections.
Mono blank needlepoint canvas is available in 10 mesh through 18 mesh. The size you need will depend upon the threads you plan to use and the level of detail in the design. 18 count canvas is for finer threads and 10 count is for tapestry wool and beginner projects as it accommodates thicker threads. If you are unsure of the size you need, just ask us for advice.
The available colors are white or brown.
Buy blank mono needlepoint canvas here.
Interlock is also a single thread needlepoint canvas but it is "interlocked" at the junctions - it looks like one thread goes through the middle of another where they intersect.
This interlocking makes the canvas junctions secure and the perfect choice for cross stitches like the Victorian Cross Stitch, where you don't want the canvas to move and distort your stitches.
Interlock blank needlepoint canvas is a good canvas to use for irregular-shaped needlepoint projects––it doesn't fray as easily as mono canvas so you can cut it into circles and shapes and play around with it more.
Interlock needlepoint canvas is lighter and easier to handle and It is cheaper than mono canvas - about half the price.
Available in mesh sizes 10-18 for needlepoint. Color is white.
Penelope is a double thread canvas which makes it strong and the best choice for furnishings and projects that will get a lot of wear and tear.
With a penelope canvas you can stitch all the holes (this is called petit point), or you can just stitch the big holes (gros point). Most stitchers stitch a penelope needlepoint canvas doing both - they stitch the small holes for the detailed areas of the design, and the large holes using a thicker thread for the background.
Penelope blank needlepoint canvas is only available in size 10/20 - this is 10 holes to the inch if you are only counting the big holes (gros point), or 20 holes to the inch if you are counting all the holes (petit point).
Color is brown.
This is what dark-colored threads, stitched upon a dark color on the needlepoint canvas, look like when lying upon a dark fabric (in this case, a pair of black pants).
In daylight...
And even harder to see at night when the lamp creates shadows...
It can end in frustration and mistakes on your canvas.
Look what happens when you lay a white cloth beneath the canvas!
The cloth reflects light and makes the dark stitches easier to see. You could wear light-colored trousers, spread a cloth on your lap, or hold a white napkin or handkerchief in your non-needle hand as you stitch. All of these solutions will reflect white light up through the holes in your canvas and make it easier to see.
This is a tip we were sent by a reader. If you sprinkle (unscented) talcum powder onto your canvas before you stitch, the white powder allows you to see the dark threads of the canvas.
Talcum powder is harmless to your canvas and threads, and it easily brushes off.
Use a cosmetic or men's shaving brush to brush the talc across your canvas. You will probably need to reapply it each stitching session.
This might sound weird but, remarkably, it works!
Daylight is the best thing for illuminating your stitching. However, we can't always stitch in the afternoon (we wish!).
Fortunately, there are some excellent, inexpensive lamps that simulate daylight.
The Hammerhead clip-on LED light is perfect for travel, as well as stitching in your chair. (And, when you're not stitching it can be used on a book.)
This light clips on to the frame that supports your canvas and the light is easily directed to where you need it.
Click to view the Hammerhead LED daylight lamp, lamp, priced at $23.00.
There are plenty of other lamp options that work well when sunlight is not available––find one that works for you so you can start to enjoy stitching dark colors in needlepoint.
For more needlepoint tips, sign up for our newsletter––and receive 10% off your next order.
]]>