How to Choose Needlepoint Stitches and Plan Your Canvas
Are you ready to move on from stitching your needlepoint canvas entirely in tent stitch (Half Cross, Continental, Basketweave)? Here are ten tips, and some basic theory, to keep in mind when choosing needlepoint stitches and planning your canvas:
1. Start Small
It takes very few decorative stitches on a needlepoint canvas to make a big impact.
The images (below) of modern needlepoint by Tapestry Girl show what an impact using just one stitch two different ways has on a needlepoint canvas. The left image is stitched entirely in tent stitch, whereas the right image has a mixture of tent stitch (for the hair) and skip tent stitch for the face (tent stitch with every second stitch left open). A small and easy change but it has a significant effect.
So, don't think you need to smother your canvas with decorative stitches in order to make it look embellished.


For example, this Charley Harper Chorus Line needlepoint has lovely detail and quite a bit of background.

The detail will be beautifully presented in a Tent Stitch, and you could choose an interesting stitch for the background - a darning stitch would look great; as would a Swirl Stitch which makes wonderful sky; or stitch with something easy and textural like a Brick Stitch. The thing is not to over-do it with too many stitches - there's already a lot of detail in the subject of this design.
As you get more experienced you'll learn ways to embellish detail with stitches if you want to. As a novice, the best way to embellish fine detail is to stick with a tent stitch and sparingly use boutique fibers like metallic, fuzzy threads etc. Rainbow Gallery is a company that offers a lot of wonderful decorative fibers.
2. Don’t forget surface embroidery/over-stitching.
This is a technique that is often overlooked in needlepoint. Surface embroidery can be used for stitching curved lines and areas of fine detail on your canvas (lettering, faces etc.). Surface embroidery might include using a back stitch in a finer thread, or applying French knots to your design at the end, or even couching threads on the top. It is a wonderful way to apply detail, texture and add interest to your design. This No Worries Jennifer Pudney needlepoint kit, below, has some Back Stitches added at the end for simple over-stitching to enhance and outline features.

3. Stitch the furthest away objects first.
If your design has elements that sit one in front of the other – this might be trees, people in a crowd, a collection of objects - stitch the furthest away objects first. The last stitches placed will then sit on top, and will bring that object further forward in the picture, where it belongs. In this Sports Star Soccer design, stitch the soccer ball last and apply the most glitz or texture to it - if you want to have it comin' at ya.

4. Big stitches need big spaces.
When choosing needlepoint stitches think about how big the area is that you have to stitch. If you want to use a stitch that needs some space to establish the pattern (e.g. Leaf or Nobuku), then you will need a larger stitching area to apply it to. Small spaces on your canvas might be best stitched in a Tent, Scotch or Cross Stitch. The Swirl Stitch shown on this Pacific Wave design takes quite a bit of room to play out so it's great for sea and sky (because it also has a wave-like movement to it) and large spaces.

5. Diagonal versus straight stitches.
It can get tricky when diagonal stitches butt up against straight stitches. This is not to say they shouldn't, just be mindful of the design elements you are portraying with your stitching, and how your planned stitches will look when they line up together. Diagonal against straight is not a smooth transition and will show separation of elements - which is great if that's what you're going for.
When you bring a diagonal stitch up against a straight stitch, stitch the straight stitch last - the straight stitches on the edge will share holes with the diagonal stitches.
6. Make things that move look like they are moving.
If there are elements in your design that move in real life – water, trees, hair – try to select stitches that have ‘movement’ in them. For example, Encroaching Oblique and Oblique Slav, Water Stitch - these all give an impression of something being moved along in a wave-like motion.
Stitches that are uni-directional give an impression of flow or movement, whereas cross stitches tend to block movement.
The variety of knots you can make (French knot, Colonial knot, bullion knot), can give movement and texture to hair or fur. We have a great page on how to needlepoint hair and fur.
7. Consider going partially naked.
You don't need to stitch all the canvas. Leaving some of it showing, particularly if it's a shaded, hand painted canvas, is a legitimate stitching technique. Use an open or darning stitch to make a pattern on the canvas and allow the painted beauty to come through. Want some ideas for good darning stitches? Check out this book.

8. Highlight the important bits
Canvases that have a lot of decorative stitches or threads can be confusing to the eye if it doesn't know where to rest. Decide what it is you want to emphasize, and make sure it's not everything!
This lovely folk art style Town With Flower Box design by Ewe and Eye and Friends has perspective to it - the flower box is in the foreground and the houses are further away.

You can easily confuse the eye by over-decorating the background objects. Stitch them first, and use decorative fibers and stitches sparingly - maybe just the sky and/or lawn at the front. Stitch the fence and flowers last, and here you can play around a bit more with fiber and stitch choice. Which leads us to...
9. Don't think you're the only one
Many novice stitchers think that everyone else knows what they're doing except them. We say time and again on this website, and in our newsletter, that there's no "right" answer to any of this. Even experienced stitchers frequently rip stitches out because they don't like how something looks. So, discard any beliefs about there being, (a) a right answer or, (b) that everyone else knows how to do it except you. Needlepoint is a very subjective thing - what one person likes another one might not be fond of. Each canvas you stitch is yours and yours alone, and only you have to like it.

Some people like highly embellished canvases... Others like a more contemporary style with just a few enhancements.

10. Invest in one or two good books.
You really don't need many needlepoint reference books - we recommend sticking with one or two that you like and use these a lot, especially when you're starting out. Otherwise it can be overwhelming and you'll throw your project in the corner to become something the cat sits on.
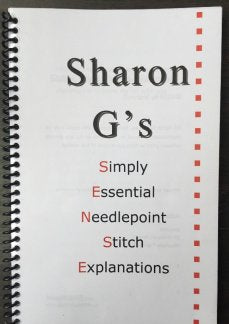
Here are two books we think every novice needlepoint artist should consider owning. There's info about the books when you click through. One is an affordable How to Needlepoint booklet that has only a few decorative stitches, but lots of well-illustrated information about needlepoint in general. The other book has around 60 stitches and they're cataloged by how you might use them - this, and the illustration-heavy style of the book, is why we recommend it as a reference for those wanting to learn how to choose stitches for a needlepoint canvas.
And, truly, that's about it. Our best advice is just to keep stitching and to try new things every so often.
Also there's no pressure to use decorative stitches... at all... ever. Here, at Needlepoint For Fun, we routinely enjoy the relaxation of stitching in Basketweave without having to concentrate on adding new twists. But, every so often one of us gets the urge to try a new stitch, and then we pretty much apply the theory we've just shared with you.

